

As a singer, you know that having the right gear is essential to getting great sound. But do you ever think about what would happen if you don’t have access to any fancy equipment? Well luckily, with just a microphone and a bit of know-how, it’s entirely possible to make beautiful music even without a karaoke machine!
In this blog post, we’ll walk through all the steps needed for setting up and using your mic effectively when there’s no karaoke machine in sight. Keep on reading and soon enough you’ll be able to belt out those tunes wherever life takes you!
Do You Need a Machine for Karaoke?
So, do you actually need a machine in order to enjoy karaoke? The answer is no! While having a machine can certainly make things easier and provide a more polished performance, it’s not necessary.
In fact, many people find that they have just as much fun without one.
If you’re planning on hosting a karaoke party, there are a few things you’ll need to make sure of beforehand.
First, you’ll need to have an audio source. This can be anything from your phone to a laptop to an old-fashioned boom box.
You’ll also need speakers so that everyone can hear the music. Finally, you’ll need a microphone. Any type will do as long as it’s plugged into the audio source.
Once you have all of these things, it’s time to start planning your party! You’ll need to choose a date, time, and location.
Once you have all of that sorted out, it’s time to start thinking about the music. You can either use pre-recorded tracks or hire a live band.
If you’re using recorded music, make sure the volume is turned up so that everyone can hear it.
For live bands, you’ll need to ask them to lower the volume of their instruments so that your microphone can be heard over them.
Now it’s time to start singing! Just remember to sing into the microphone, not at it. This will help ensure that everyone can hear you clearly.
Having said that, a Karaoke machine can be a great addition to any party! They provide a more polished performance and can make things run more smoothly.
If you’re planning on hosting a karaoke party, make sure you have all the necessary equipment and follow these tips so that everyone has a great time!
How Do I Connect a Microphone to My TV?
If you want to connect a microphone to your TV, there are a few things you’ll need to do first. First, you’ll need to find an audio input on your TV.
This is usually located on the back of the TV or on the menu. Once you’ve found it, plug the microphone into the input using an RCA cable.
Next, you’ll need to adjust the volume on both the microphone and the TV.
The exact location of the volume controls will vary depending on your TV model, but they’re usually located in the menu or on the remote control.
Once you’ve found them, turn up the volume on both until it’s at a comfortable level.
Now it’s time to test the connection. Start by speaking into the microphone and seeing if you can hear yourself through the TV.
If everything is working, you should be able to hear your voice coming through the speakers. If you can’t hear anything, make sure that the volume is turned up and that the microphone is properly plugged in.
Once you’ve got the connection sorted out, it’s time to start using the microphone. One popular use for a microphone connected to a TV is karaoke.
If you want to try this, simply put on a karaoke DVD or CD and start singing along. The lyrics will appear on the screen, so all you need to do is follow them and sing into the microphone.
Another great use for a microphone connected to your TV is to use it as a makeshift PA system.
This can come in handy if you’re having a party or event and need to make announcements. To do this, simply plug the microphone into the input and turn up the volume.
Then, start talking into the microphone and your voice will be amplified through the TV’s speakers.
So there you have it, a few different ways that you can use a microphone with your TV.
Whether you’re looking to add karaoke fun to your next party or just need a quick and easy way to make announcements, connecting a microphone to your TV is a great solution.
Just remember to follow the instructions above and you’ll be up and running in no time.
How Can I Make Karaoke at Home?
If you love singing karaoke but don’t want to go out to a bar or club every time you want to do it, why not try making karaoke at home?
It’s actually pretty easy to do and all you need is a TV, a DVD player, and a microphone. Here’s how you can get started.
First, find a karaoke DVD that you like. There are tons of different titles available, so take your time and browse through the selection until you find one that you think you’ll enjoy.
Once you’ve found a few that you like, pop them into your DVD player and start singing along.
If you don’t have a karaoke machine, don’t worry – you can still make karaoke at home.
All you need is a TV and a DVD player. Simply insert the karaoke DVD into the DVD player and start singing along. The lyrics will appear on the screen, so all you need to do is follow them.
If you want to turn up the volume, you can always use your TV’s remote control to do so. Just remember to turn it down when you’re done singing so that your neighbors don’t complain!
Making karaoke at home is actually pretty easy and it’s a great way to enjoy your favorite songs without having to go out to a bar or club. Just pop in a karaoke DVD, grab a microphone, and start singing along.
How Do I Make Karaoke on My Phone?
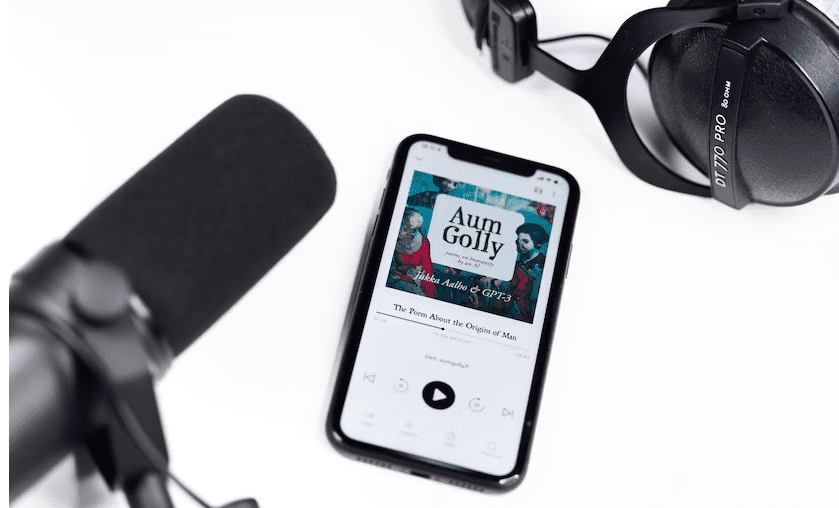
If you’re looking for a way to make karaoke on your phone, there are a few different options available. You can either use an app or download a karaoke file onto your phone. Here’s a look at how each method works.
Using an App:
There are tons of karaoke apps available for both iPhone and Android devices. Simply search for “karaoke” in the app store and browse through the selection until you find one that you like.
Once you’ve found an app that you want to use, follow the instructions to download and install it onto your phone.
Once the app is installed, open it up and start browsing through the song selection. When you find one that you want to sing, simply tap on it and the lyrics will appear on the screen.
Downloading a Karaoke File:
If you don’t want to use an app, you can always download a karaoke file onto your phone.
There are tons of different websites that offer karaoke files for download, so simply search for “karaoke downloads” and browse through the selection until you find a site that you like.
Once you’ve found a site that you want to use, follow the instructions to download the karaoke file onto your phone. Once the file is downloaded, open it up in a media player and start singing along.
Making karaoke on your phone is actually pretty easy and it’s a great way to enjoy your favorite songs without having to go out to a bar or club.
Just download a karaoke file or use an app and start singing along.
Is There an App for Karaoke?
Yes, there are tons of karaoke apps available for both iPhone and Android devices. Simply search for “karaoke” in the app store and browse through the selection until you find one that you like.
Once you’ve found an app that you want to use, follow the instructions to download and install it onto your phone.
Once the app is installed, open it up and start browsing through the song selection. When you find one that you want to sing, simply tap on it and the lyrics will appear on the screen.
Can I Use a Soundbar for Karaoke?
Yes, you can absolutely use a soundbar for karaoke. In fact, many people prefer to use a soundbar because it offers better sound quality than a traditional karaoke machine.
If you’re looking for a soundbar that’s specifically designed for karaoke, there are a few different options available. However, any good-quality soundbar will work just fine.
Below is a table that shows options on How to Use a Microphone Without a Karaoke Machine:
| Step | Description |
|---|---|
| Step 1 | Find a microphone |
| Step 2 | Connect the microphone to a speaker or amplifier |
| Step 3 | Open a music or karaoke app on your device |
| Step 4 | Play the music or karaoke track through the speaker or amplifier |
| Step 5 | Hold the microphone close to your mouth and sing or speak into it |
| Step 6 | Adjust the volume levels of the music and microphone to balance the sound |
| Step 7 | Enjoy singing or speaking through the microphone! |
How do I connect my microphone to my receiver?
The first thing you’ll need to do is identify the type of input on your receiver. Most receivers have a 1/4-inch stereo plug or an XLR input, but some may also accommodate USB connections. Once you know which type of connection your receiver needs, then you can get the right cable for connecting your microphone.
If your microphone has a 1/4-inch plug, as many professional models do, then all you’ll need is a simple adapter cable with one male end that fits into your mic and another male end that plugs into the receiver’s input jack. If your mic has an XLR output, you’ll need an XLR cable to make the connection between it and the receiver.
If either of these sounds like too much trouble, you can always go for a USB connection. This type of connection is becoming increasingly popular and many microphones now have the option to connect via USB. Keep in mind that this will require a separate power source for the microphone, so make sure to check that your receiver has enough power before you attempt this.
Once everything’s connected, you’ll want to check the levels on your receiver and adjust them according to your needs. You may need to experiment with different settings until you get the sound quality you desire. Finally, be sure to save any changes you make so they can be recalled later!
How do I add a microphone to my speakers?
Adding a microphone to your speakers is not that complicated. You will need an adapter cable and a microphone with an XLR or TRS (tip-ring-sleeve) connection.
To get started, locate the input port on your speakers. This could be an XLR or 1/4 inch TRS jack, depending on what type of setup you have.
Plug one end of the adapter cable into the input port, making sure it’s firmly secured. On the other end of the adapter cable, plug in your microphone with either an XLR or TRS connection. Finally, adjust any settings on your speaker system related to gain and frequency response so that they match up with those of your microphone. This way, you can ensure that your microphone will output audio at the same level as your speaker’s input.
And that’s it! You’re now ready to use your microphone with your speakers. Just remember to disconnect the adapter cable when you’re done using it so that there is no risk of damaging either device. Enjoy!
Can I plug a microphone directly into an amplifier?
The answer is yes, you can plug a microphone directly into an amplifier. However, the outcome won’t be the same as when using a mixer or preamp. Without one of these devices, the sound quality may suffer due to distortion, noise, and interference.
Additionally, if you’re using a higher-end microphone that requires phantom power for operation, an amplifier alone will not provide this feature and so the mic won’t work properly. Therefore it’s best to use equipment designed for audio production like mixers and preamps in order to ensure optimal sound quality from your microphones.
How do I connect my microphone input?
To connect your microphone input, you will need to identify the input jack on your computer. Depending on your system and device, this could be a 3.5 mm port, USB port, or something else. Once you have identified the correct port, plug in the microphone’s cable and adjust any settings in your audio software.
If you are using a sound card instead of an integrated audio device on your motherboard, then make sure that it is properly installed and connected before trying to set up the microphone input. After all these steps have been completed, test out if your microphone is working by running some basic recording tests. If everything sounds good then you should be all set! Good luck!
Why is my mic not detecting any input?
This issue can be caused by a variety of factors. First, make sure that you have the right settings enabled in your audio software. Check that your mic is selected as the default input device and that the volume level is turned up high enough. If this doesn’t resolve the problem, ensure that your mic is connected properly to your computer and that there are no other programs using it at the same time.
Additionally, if you’re using an external microphone, try unplugging it from its power source and then plugging it back in again; this may kick-start it into working. Finally, check for any physical obstructions like dirt or dust buildup on both ends of the cable – these can prevent sound from traveling through correctly.
How do you set up a microphone?

The first step is to decide on the location of the mic. You want to make sure it’s close enough to pick up sound, but far enough away that you don’t get feedback or noise interference. Once you have your spot chosen, it’s time to plug in your mic.
Many mics will come with an XLR cable, so you’ll need an audio interface if you’re connecting it directly to your computer. If your mic has a USB connection, then all you need is a USB port and the correct driver for your operating system. Next, adjust the gain on the microphone preamp (if there is one) and make sure any other settings are properly adjusted for optimal sound quality.
Finally, test out the microphone by recording yourself speaking or singing into it and make sure your levels are good. Once you’re all set up, you can start recording!
How do I enable my microphone device?
Enabling your microphone device is easy! First, open the sound settings menu on your computer by right-clicking the Volume icon on your taskbar. From there, click ‘Recording’ and select your microphone from the list of devices. Click ‘Enable’ if it isn’t already enabled, and you’re good to go!
If you don’t see your device listed, make sure that it is plugged in properly and try again. Now you’ll be able to use your microphone for voice calls, video conferences, recordings, and more! Enjoy!
Final Words
Karaoke is a great way to enjoy your favorite songs and have a good time with friends. If you don’t have a karaoke machine, don’t worry – you can still make karaoke at home!